

Installing a fiberglass tower chimney on a rooftop is a technical task that requires careful planning, proper tools, and adherence to safety regulations. As a supplier of Fiberglass Tower Chimney, I've seen firsthand the benefits of these chimneys and understand the importance of a correct installation. In this blog, I'll guide you through the step - by - step process of installing a fiberglass tower chimney on a rooftop.
Step 1: Pre - installation Assessment
Before you start the installation, it's crucial to conduct a thorough assessment of the rooftop. First, check the structural integrity of the roof. Fiberglass tower chimneys can be heavy, especially when fully assembled and filled with exhaust gases. Ensure that the roof can support the weight of the chimney and any additional loads such as wind and snow. You may need to consult a structural engineer if you're unsure about the roof's capacity.
Next, identify the best location for the chimney. It should be placed in an area that allows for proper ventilation and is away from any obstructions such as vents, skylights, or other structures. The location should also comply with local building codes and regulations regarding chimney placement.
Step 2: Gather the Necessary Tools and Materials
Once you've completed the pre - installation assessment, it's time to gather all the tools and materials you'll need. For a fiberglass tower chimney installation, you'll need:
- Fiberglass tower chimney sections: Make sure you have the correct number and size of sections as specified in the chimney's installation manual.
- Sealant: A high - quality sealant is essential to prevent leaks between the chimney sections and at the roof penetration point.
- Mounting brackets: These are used to secure the chimney to the rooftop.
- Screwdrivers, wrenches, and other hand tools: For assembling the chimney sections and attaching the mounting brackets.
- Safety equipment: This includes safety harnesses, hard hats, and goggles to protect yourself during the installation process.
Step 3: Prepare the Rooftop
Before you start installing the chimney, you need to prepare the rooftop. First, clean the area where the chimney will be installed. Remove any dirt, debris, or old roofing materials. This will ensure a clean and smooth surface for the chimney installation.
Next, mark the location for the chimney base on the roof. Use a chalk line or a marker to make clear and accurate markings. Make sure the markings are in line with the pre - determined location and comply with the chimney's installation requirements.
Step 4: Assemble the Fiberglass Tower Chimney
Now it's time to assemble the fiberglass tower chimney. Start by laying out the chimney sections on a flat and stable surface. Carefully align the sections and apply a generous amount of sealant to the joints. Use the provided clamps or fasteners to hold the sections together while the sealant dries.
Follow the installation manual's instructions for assembling the chimney. Some chimneys may require additional steps such as installing internal baffles or insulation. Make sure you complete all the necessary assembly steps before moving the chimney to the rooftop.
Step 5: Lift and Position the Chimney on the Rooftop
Once the chimney is fully assembled, it's time to lift it onto the rooftop. This is a critical step that requires careful planning and the use of proper lifting equipment. You can use a crane or a hoist to lift the chimney safely.
When lifting the chimney, make sure it is balanced and stable. Have a team of trained personnel on the rooftop to guide the chimney into position. Once the chimney is in place, align it with the markings on the roof and lower it gently onto the base.
Step 6: Secure the Chimney to the Rooftop
After the chimney is positioned on the rooftop, it's time to secure it using the mounting brackets. Attach the brackets to the chimney and the roof structure according to the installation manual's instructions. Use the appropriate screws or bolts to tighten the brackets securely.
Make sure the chimney is level and plumb. Use a level to check the vertical and horizontal alignment of the chimney. Adjust the mounting brackets if necessary to ensure a proper fit.
Step 7: Seal the Roof Penetration
The next step is to seal the roof penetration point to prevent water leaks. Apply a layer of sealant around the base of the chimney where it meets the roof. Use a roofing membrane or flashing to cover the sealant and provide additional protection against water infiltration.
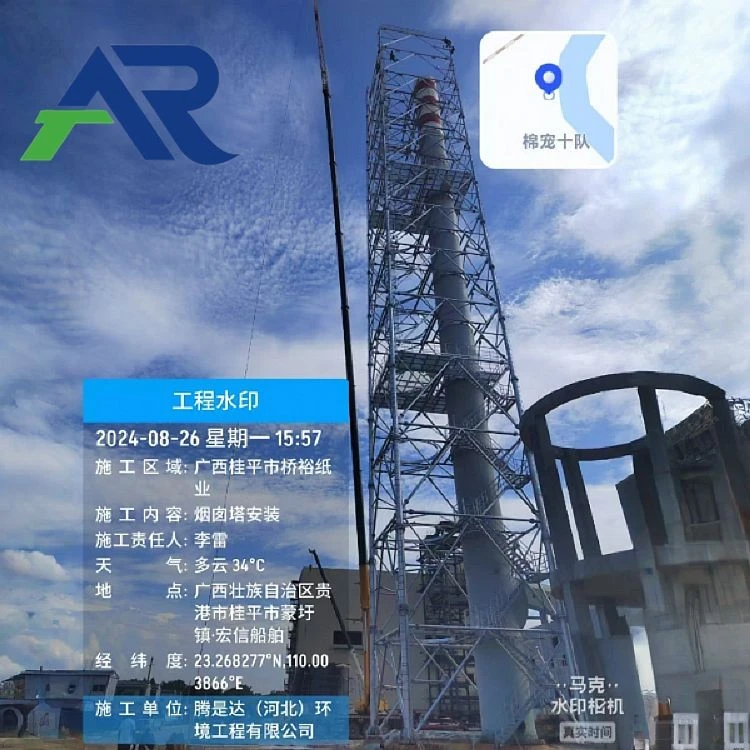

Make sure the sealant is applied evenly and completely covers the joint. Allow the sealant to dry according to the manufacturer's instructions before proceeding.
Step 8: Connect the Chimney to the Exhaust System
Once the chimney is secured and the roof penetration is sealed, it's time to connect the chimney to the exhaust system. This may involve connecting the chimney to a furnace, boiler, or other heating equipment.
Follow the manufacturer's instructions for connecting the chimney to the exhaust system. Use the appropriate connectors and gaskets to ensure a tight and leak - free connection.
Step 9: Conduct a Final Inspection
After the installation is complete, conduct a final inspection of the chimney and the installation. Check for any signs of leaks, loose connections, or other issues. Make sure the chimney is properly aligned and secure.
Test the exhaust system to ensure that the chimney is functioning correctly. Look for any signs of back - drafting or other ventilation problems. If you notice any issues during the inspection, address them immediately before using the chimney.
Step 10: Maintenance and Safety Considerations
Once the fiberglass tower chimney is installed and in use, it's important to perform regular maintenance to ensure its longevity and safe operation. This includes inspecting the chimney for damage, cleaning the chimney regularly, and checking the seals and connections.
In addition to maintenance, it's crucial to follow all safety regulations when using the chimney. This includes keeping flammable materials away from the chimney, ensuring proper ventilation, and having a working smoke detector in the vicinity.
If you're interested in purchasing a Fiberglass Tower Chimney or a Titanium Steel Composite Plate Tower Chimney, we're here to assist you. Our team of experts can provide you with detailed product information, installation guidance, and answer any questions you may have. Feel free to reach out to us for procurement discussions and to learn more about how our high - quality chimney products can meet your needs.
References
- Manufacturer's installation manuals for fiberglass tower chimneys
- Local building codes and regulations regarding chimney installation
- Industry standards for chimney safety and ventilation